本地OCR识别训练字库
本文从网上转载而来
作者:戎码虫
原文链接:https://www.jianshu.com/p/3326c7216696
如有侵权请联系删除
简介
OCR(Optical Character Recognition):光学字符识别,是指电子设备(例如扫描仪或数码相机)检查纸上打印的字符,通过检测暗、亮的模式确定其形状,然后用字符识别方法将形状翻译成计算机文字的过程。
Tesseract:开源的OCR识别引擎,初期Tesseract引擎由HP实验室研发,后来贡献给了开源软件业,后由Google进行改进、修改bug、优化,重新发布。
下载
1、Windows版本Tesseract各版本下载,本教程用的版本是tesseract-ocr-setup-4.00.00dev.exe(【注意】要3.0以上才支持中文)。
项目github地址:Tesseract
2、[各版本对应字库](
https://github.com/tesseract-ocr/tesseract/wiki/Data-Files) 要识别简体中文需要下载chi_sim.traindata字库(【注意】根据版本下载对应字库)。
3、jTessBoxEditor官网下载,用来训练字库的,带FX的版本才支持中文。
安装
1、点击tesseract-ocr-setup-4.00.00dev.exe文件,按提示安装就行,安装成功之后如下张图:
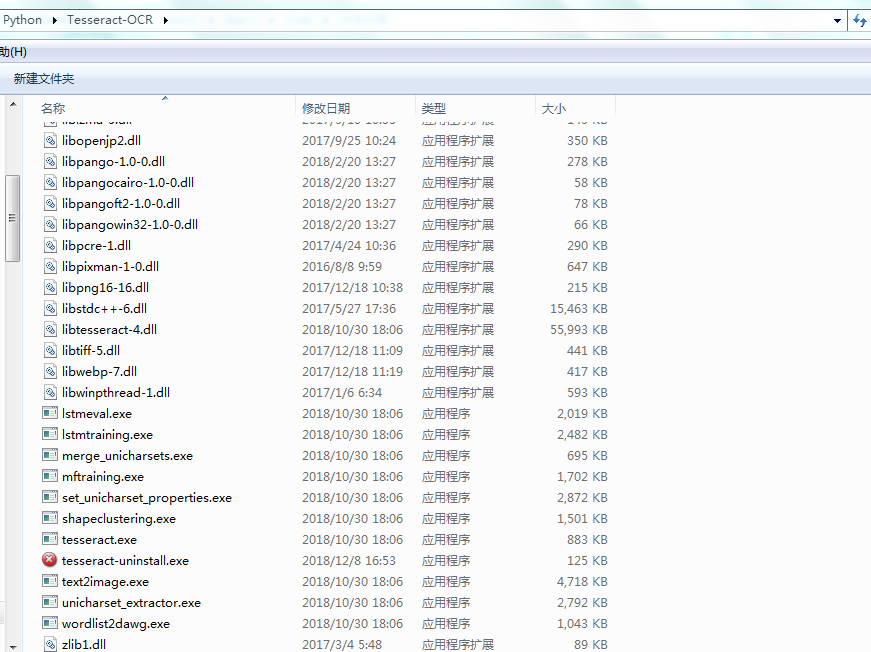
安装目录
【注意】tesseract在win7系统配置环境变量跟java jdk配置相同。
复制你的安装路径,我的安装路径D:PythonTesseract-OCR,界面如下:

打开我的电脑系统属性->高级->环境变量

环境配置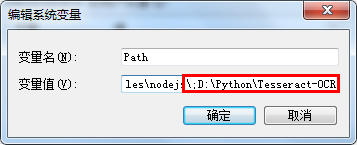
添加路径
【注意】与其他路径要以;隔离出来。
在cmd窗口输入tesseract -v,配置成功如下图:

配置成功
2、将下载好的字库放到Tesseract-OCR项目的tessdata文件夹里面。
识别
进入cmd,进入到要识别的图片的路径下E:PythonCode*tesseract图片识别(根据自己图片位置而定),输入命令
tesseract 图片名称 生成的结果文件的名称 字库例如我的图片识别就是:
tesseract test.png result -l chi_sim错误1
安装tesseract-ocr时,改变了默认路径,执行命令出现如下错误:

错误1
增加一个TESSDATA_PREFIX变量名,变量值为我的语言字库文件夹安装路径D:PythonTesseract-OCRtessdata 添加到变量中;如下图: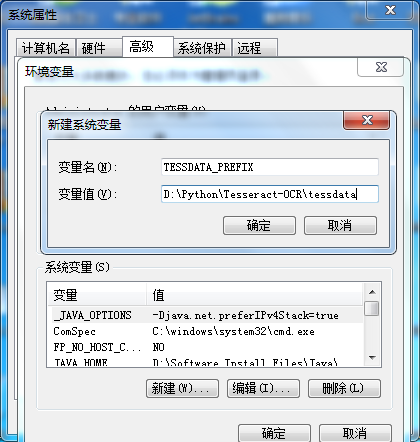
添加变量
错误2
当字库里面没有对应字库时,会提示以下错误:

错误2
可以用命令tesseract --list-langs来查看Tesseract-OCR支持语言,如果没有则自行添加对应库。
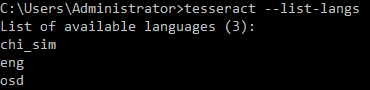
image.png
识别结果
示例1:先拿一个比较简单图片来识别

test1.png
切换到图片目录在cmd窗口执行以下命令行:
tesseract test1.png result -l chi_sim-l chi_sim 表示用简体中文字库(需要下载中文字库文件,解压后,存放到tessdata目录下去,字库文件扩展名为 .raineddata 简体中文字库文件名为: chi_sim.traineddata)
test1.png
打开图片目录下result.txt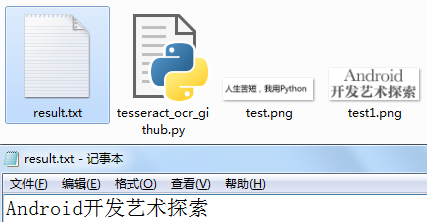
识别结果1
示例2:

test2.png
tesseract test2.png result -l chi_sim -psm 7-psm 7 表示告诉tesseract code.jpg图片是一行文本 这个参数可以减少识别错误率. 默认为 3
识别结果:
识别结果2
当识别效果不太理想,我们就要训练自己的字库
训练
1、准备图片
彩色图片进行灰度化处理,在线png2tif地址将图片转换成tif格式,或者画图打开,另存为tif文件前后两个图片放在同个目录中,用于后面生成box文件。
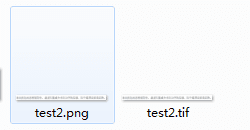
image.png
【注意】如果存在多张图片,则需要合并 tif,在Box Editor中点击Tools->Merge Tiff ,按住shift键选择多个tif文件,并把合并生成的tif文件放到新目录中,重新命名;样本图像文件格式必须为tiftiff格式,否则在Merge样本文件的过程中会出现 Couldn’t Seek 的错误。
tif文件命名格式[lang].[fontname].exp[num].tif
tif命名规则:lang为语言名称,fontname为字体名称,num为图片序号;
比如我们要训练自定义字库 testlang、字体名normal,则命名为testlang.normal.exp0.tif
【注意】在tesseract中,一定要注意格式,否则后面会出现莫名的错误
2、生成box文件
切换到合成的tif文件夹下,执行命令,生成box文件
tesseract tif文件名.tif -l 字体库 box文件名 makeboxtif文件名与box文件名保持一致
tesseract testlang.normal.exp0.tif -l chi_sim testlang.normal.exp0 makebox【注意】以简体中文字库识别,用其他字库解析不出来
3、修改box文件
将jTessBoxEditor下载后解压,点击运行
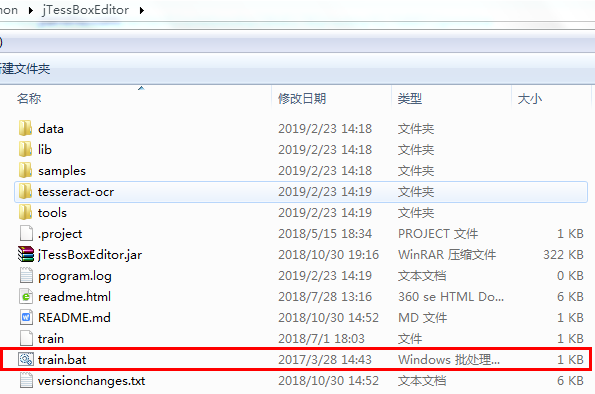
train.bat
【注意】这个工具是基于java虚拟机运行的,电脑是必须是Java运行环境
点击Box Editor->Open->选择testlang.normal.exp0.tif,选择testlang.normal.exp0.tif会自动加载testlang.normal.exp0.box
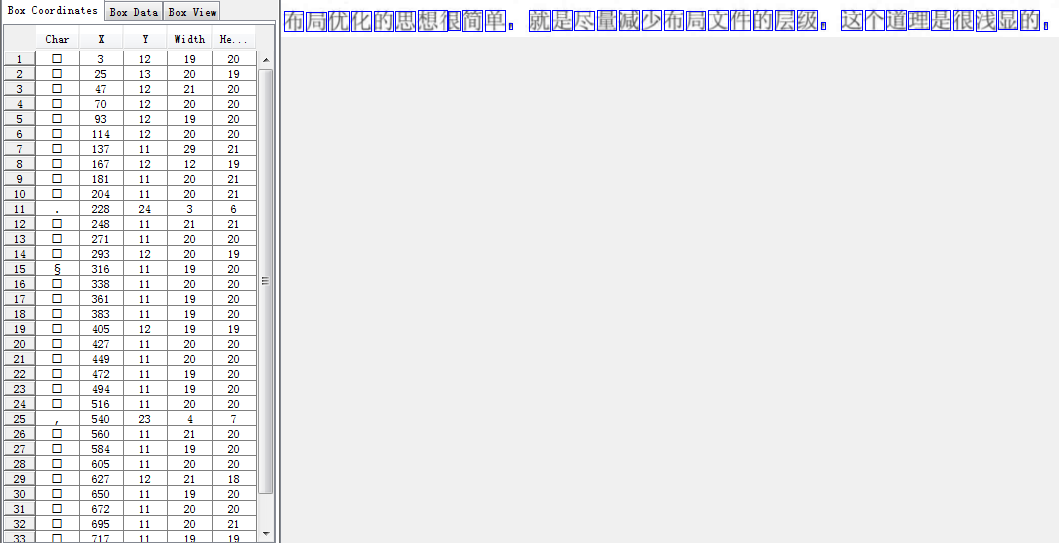
image.png
【注意】box文件和对应的tif一定要在相同的目录下,不然后面打不开。
错误
如果jTessBoxEditor char列出现了乱码,点击setting->font->宋体
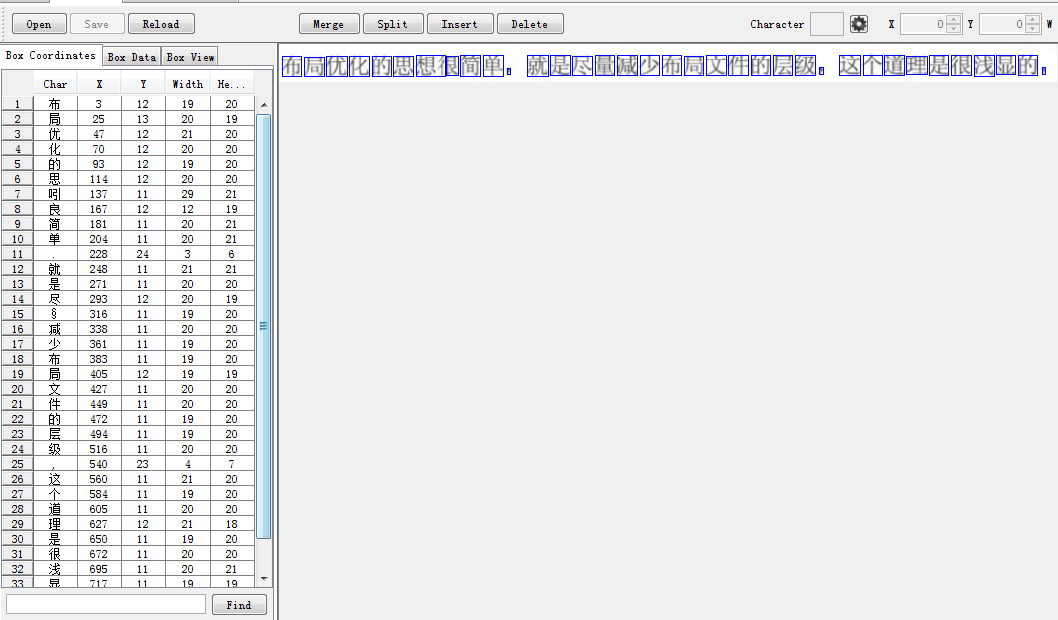
image.png
从结果看,需要矫正的文字

image.png
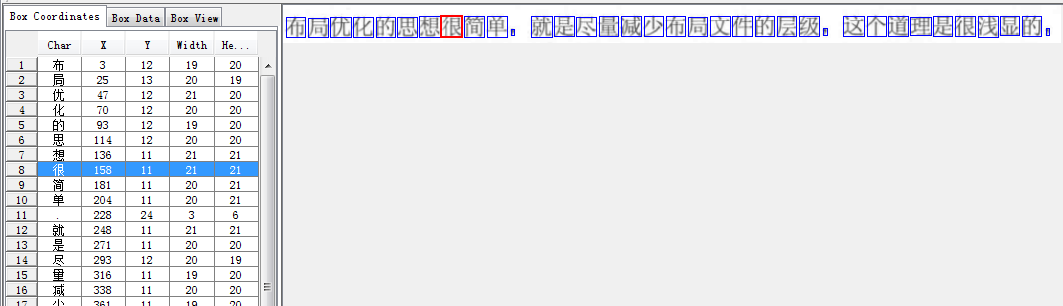
image.png
多个tif记得翻页修改,修改之后记得save哦
翻页修改
4、生成font_properties
执行echo命令生成font_properties
echo normal 0 0 0 0 0 >font_properties【语法】<fontname> <italic> <bold> <fixed> <serif> <fraktur>
fontname为字体名称,italic为斜体,bold为黑体字,fixed为默认字体,serif为衬线字体,fraktur德文黑字体,1和0代表有和无,精细区分时可使用。
【注意】这里输入的 “normal” 名称必须与 “testlang.normal.exp0.box” 中两个点号之间的 “normal” 名称保持一致。
5、生成训练文件
执行命令,生成testlang.normal.exp0.tr训练文件
tesseract tif文件名.tif tr文件名 -l 字库名 nobatch box.traintif文件名与tr文件名一致
tesseract testlang.normal.exp0.tif testlang.normal.exp0 -l chi_sim nobatch box.trainE:\PythonCode\SpiderWeb\tesseract图片识别>tesseract testlang.normal.exp0.tif testlang.normal.exp0 -l chi_sim nobatch box.train
Tesseract Open Source OCR Engine v4.00.00alpha with Leptonica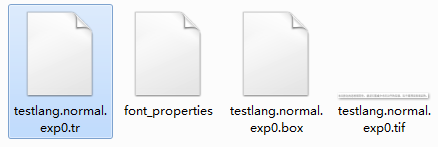
image.png
6、生成字符集文件
执行命令,生成名为unicharset的字符集文件
unicharset_extractor box文件名字.boxunicharset_extractor testlang.normal.exp0.boxE:\PythonCode\SpiderWeb\tesseract图片识别>unicharset_extractor testlang.normal.exp0.box
Extracting unicharset from testlang.normal.exp0.box
Wrote unicharset file ./unicharset.
image.png
7、生成聚集字符特征文件
执行命令,生成3个特征字符文件,inttemp、pffmtable、shapetable
mftraining -F font_properties -U unicharset -O tr文件名.trmftraining -F font_properties -U unicharset -O unicharset testlang.normal.exp0.trE:\PythonCode\SpiderWeb\tesseract图片识别>mftraining -F font_properties -U unicharset -O unicharset testlang.normal.exp0.tr
Warning: No shape table file present: shapetable
Failed to load unicharset from file unicharset
Building unicharset for training from scratch...
Failed to load unicharset from file unicharset
Building unicharset from scratch...
Failed to load unicharset from file unicharset
Building unicharset from scratch...
Failed to load unicharset from file unicharset
Building unicharset from scratch...
Reading testlang.normal.exp0.tr ...
Flat shape table summary: Number of shapes = 0 max unichars = 0 number with multiple unichars = 0
Warning: no protos/configs for Joined in CreateIntTemplates()
Warning: no protos/configs for |Broken|0|1 in CreateIntTemplates()
Done!
3个特殊文件
8、生成字符正常化特征文件
执行命令,生成normproto文件
cntraining tr文件名.trcntraining testlang.normal.exp0.trE:\PythonCode\SpiderWeb\tesseract图片识别>cntraining testlang.normal.exp0.tr
Reading testlang.normal.exp0.tr ...
Clustering ...
Writing normproto ...9、重新命名
执行命令,把步骤7,步骤8生成的特征文件进行更名
rename 旧文件名 新文件名依次执行以下命令
rename normproto testlang.normproto
rename inttemp testlang.inttemp
rename pffmtable testlang.pffmtable
rename unicharset testlang.unicharset
rename shapetable testlang.shapetable
10、合并训练文件
执行命令,生成.traineddata文件
combine_tessdata 合成文件名.combine_tessdata testlang.E:\PythonCode\SpiderWeb\tesseract图片识别>combine_tessdata testlang.
Combining tessdata files
Output testlang.traineddata created successfully.
1:unicharset:size=1788, offset=168
3:inttemp:size=177486, offset=1956
4:pffmtable:size=307, offset=179442
5:normproto:size=3594, offset=179749
13:shapetable:size=508, offset=183343【注意】命令后面的.

最终合成
将 testlang.traineddata文件拷贝到tesseract安装目录的tessdata目录下,才能被tesseract找到。在test图片所在目录下创建一个windows的脚本文件 testlang.bat,输入如下内容
set filename=testlang.normal.exp0

:: 生成字符集文件
echo Generate unicharset...
unicharset_extractor %filename%.box

:: 生成训练文件
echo Run Tesseract for Training...
tesseract %filename%.tif %filename% nobatch -l chi_sim box.train

:: 生成font_properties
echo Generate font_properties...
echo normal 0 0 0 0 0 >font_properties

:: 生成聚集字符特征文件
echo Generate Character...
mftraining -F font_properties -U unicharset -O unicharset %filename%.tr

:: 生成字符正常化特征文件
echo Clustering...
cntraining %filename%.tr

:: 重新命名
echo Rename Files...
rename normproto testlang.normproto
rename inttemp testlang.inttemp
rename pffmtable testlang.pffmtable
rename shapetable testlang.shapetable
rename unicharset testlang.unicharset

:: 合并训练文件
echo Create Tessdata...
combine_tessdata testlang.

pause
11、测试训练识别库
执行以下命令,进行验证
tesseract test2.png chi_sim_result -l chi_simtesseract test2.png testlang_result -l testlang
训练之后的结果对比
tessdata的合并必须要拥有.box文件,不能将自己训练合并到系统自带的字库中,我们可以用+结合使用
tesseract test2.png result -l chi_sim+testlang总结
总体流程:安装jTessBoxEditorFX-> 获取样本.tif文件 -> Merge样本文件 –> 生成BOX文件 -> 字符矫正 -> 执行脚本文件 -> 将生成的.traineddata文件放入Tesseract-OCRtessdata文件夹下
tesseract识别率,通过样本数量提升,呈对数型增长
如何在触摸精灵里使用自制的字库
1.将按照上面方法制作出来的字库 testlang.tessdata 文件上传到触摸精灵 /var/touchelf/tessdata/ 文件夹内
2.使用如下代码:
function main()
    local inspect = require('inspect')
    local f = "/var/touchelf/a.jpg"
    snapshotScreen(f)
    code, info = localOcrTextEx("/var/touchelf/tessdata",         -- 语言包tessdata目录在设备中的路径
                                                    "testlang",  -- 语言类型为自制语言包
                                                    "",     -- 白名单为空
                                                    f); -- 图片地址
    if code == "" then
        notifyMessage("识别失败");
    else
        notifyMessage(string.format("识别成功: %s", code));
        logDebug(inspect(info))
    end

end
 触摸精灵
触摸精灵 触摸抓抓
触摸抓抓